31 Mar 2023

Revisiting an immune boosting tea from the herb garden


And, finally, there was tea ...


It's probably a bit early for all the herbs in this tea to be available in the garden but as many of my friends and family have colds at the moment, it seems timely to revisit this delicious tea.  

Some readers may remember this tea ... I initially wrote this as part of a look back at May 2020 in the garden - a time when we needed all the immune support we could get! So, if these plants are not flourishing in your garden yet (take heart, it won't be long), bookmark this post to come back to it.  And while the plants are available, pick and dry some of the leaves to store for winter colds. 

And if you don't already grow these plants, can I suggest that all of these are well worth growing?  Lemon balm is so easy to grow, loves shade and still it tends to self seed vigorously.  I now also grow Lemon Verbena - it's a glorious herb, and I keep the lemon balm shorn to a more manageable blob. 

Five herbs to steep in a teapot for a delicious immune boosting herb tea - achillea, calendula, mint, lemon balm, thyme.

An Australian permaculture channel posted a video for what they call 'Immune-i-Tea' ... a delicious immune boosting drink made from garden herbs.  To my delight, I found that I had all of the necessaries in my herb garden.

Just five herbs needed in roughly equal quantities, a small handful of each of yarrow (achillea), calendula flowers, mint, thyme and lemon balm.  Put into a large teapot, cover with boiling water and put the lid on.  Leave for at least 10 minutes and then pour.  It was surprisingly thirst quenching, tasty and uplifting and, I imagine, would also be lovely chilled. I think I may never buy another herbal tea bag.

20 Feb 2023

The How and Why of growing Jerusalem Artichokes

Spot the real sunflower - most of these are Sunchokes (Helianthus tuberosus)

My new discovery for the veg patch last year was Jerusalem Artichokes, also known as Sunchokes. I grew them for the sunflowers, little knowing of their many health benefits!

I'd resisted growing Jerusalem artichokes until the day they were served up as a side veg at a particularly posh restaurant meal that I was invited to attend. First tastes didn't provoke a eureka moment but that smooth blob of puréed sun-chokes piqued my curiosity. Was this a useful addition to the veg patch? And was their reputation for causing flatulence justified? 

There were two important things that started my growing experiment:  

One, the plants are in the same plant family as sunflowers;  so it's a double win for the veg garden to get cheerful pollinator attracting sunflowers and, of course, those edible tubers after the flowers have faded. Plus seedheads in the autumn for birds to munch on. Triple win! 

Secondly, I read that specialist tubers are not obligatory so I grabbed a bag of Jerusalem artichokes from the veg aisle in my local supermarket to start the experiment - and, even better, they were at sale price being at their 'best before' date.  

Sunchoke leaves are less serrated than regular sunflower leaves.

Growing them is easy: 

I dug a foot wide shallow trench in a sunny corner of the veg patch, forked in some compost from my Hotbin (although any compost would do), buried the tubers about 4 inches deep, spaced them 8 inches apart, then covered them over again with soil. Job done. And then watered and waited. Probably longer than was necessary but the tubers can be left in the ground until needed. Just wait until the flowers have finished. So simple. 

They didn't need earthing up like potatoes, they didn't need staking like tall sunflowers - unless your site is very windy - plus they're fairly pest resistant. And each tuber planted produced around 10 to15 more which I have roasted, pureed and mashed. Deliciously nutty, but their gassy reputation is warranted in my case. Enough said.

But not to be put off by their wind producing side effects, this year I'm bordering the veg patch with an extended row of Jerusalem Artichokes. Why? because they have some very good health benefits.
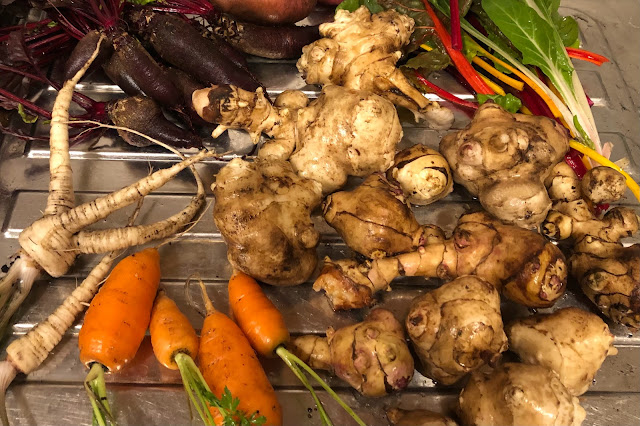
A harvest of home grown winter vegetables
Harvesting Jerusalem artichokes from October through to January! 

So let's talk health benefits ...

These tubers are allegedly a nutritional powerhouse.  They're a good source of antioxidants which makes them gut-friendly and immune-boosting. They're also packed with fibre, iron, potassium and phosphorus. (Huh? I had to find out what phosphorus is in relation to the human body, rather than soil!  It's a mineral that supports the formation of bones and teeth, repairs cells, normalises the heartbeat, kidney function and muscle contractions. So .. pretty important stuff.)

But what they're most famous for is their high inulin content. Inulin is a carbohydrate that acts as a prebiotic, feeding your good gut bacteria to keep your innards healthy.  It's hard to digest so when it reaches the intestines, it feeds the gut bacteria which then produce methane gas ... yes, the source of their nickname, fartichokes. 

That aside, Jerusalem artichokes are touted as a good substitute for potatoes being low carb, low sugar and full of fibre. 

They're still a bit of a novelty for me and I now know to eat them as a treat rather than every day and certainly not in any great quantity as I could feel (and hear!) the effect they had on my intestines for a couple of days. 

There is a way to lessen the gassiness ...

I've read that there are three ways to reduce the side effects of Jerusalem artichokes.  The first is to gradually increase the amount eaten in order to get your body to adapt; the second is to boil the sliced tubers in lemon juice which turns the inulin into fructose thereby making them sweeter but less gassy. The third is to slice and pickle them, retaining the nutty flavour and crunch.  Option 3 sounds interesting!

So, a potato substitute with health benefits and cheerful flowers ... will you give them a go this year?

A few of the ultra-delicious recipes I've tried!

If you're new to cooking Jerusalem artichokes, can I steer you in the direction of Riverford Organic Farmers website?  Here you'll find not only a few of the recipes that inspired me but also some good advice on preparing the tubers if you watch the video in the first recipe listed below.

Roasted Jerusalem artichokes with mushrooms, rosemary and garlic - still my favourite

Jerusalem artichoke and bacon gratin - cheese, bacon, cream and sunchokes, delicious.

Jerusalem artichoke and leek soup - the perfect soup using available veg from the winter garden. 

Happy munching! 

And here's Charles Dowding showing how he grows his Jerusalem Artichokes:

https://youtu.be/jIM2mxswJZ8


24 Nov 2022

Getting the garden ready for winter

Before thinking about any seasonal holidays, and before the weather turns frosty, there are still a few pre-winter jobs to complete by way of thanking the garden for its sterling work this year and give it a boost to prepare for next. But perhaps you're already ahead of me on that one?


These are questions I'm asking myself:  Have you gathered and bagged up leaves? Emptied the compost bin? Mulched your borders? Cleared the summer veg beds? Started off garlic cloves? Planted pots for a bit of winter pizazz? Pruned the roses? Given the hedge a last trim? Got all those spring bulbs planted?  Yes? Ah, maybe that's just me falling behind then.  Time to get busy!

I regret not making the most of the gorgeously warm start to autumn now normal service has resumed - damp foggy mornings and dropping temperatures ... but the golden hues of trees heading towards their winter hibernation and shrubs dripping with berries is a trade off I can live with. 

During the day I garden for other people so my own garden goes to the back of the queue - see list above and the reason why I still have bulbs to plant - tulips, snowdrops, leucojum, fritillaries and iris reticulata; I can't resist buying them and adding to my pots and borders. November is a good time to get bulbs in the ground before the soil (and air!) becomes noticeably colder. So that's got to be one of the first tasks on my list of self-perpetuating garden work. 

This month is also good for dividing perennials and moving plants.  I've a chunk of rhubarb to move and  have also promised to dig up some of my hellebores for a lovely 90 year old for her garden.  Last year I took round a few of my self seeded forget-me-nots; they flowered frothily in spring and have spread prolifically. I've relocated a few clumps to create flower drifts across her borders ... just dig them up with a good root ball attached and replant straight away into the new position. 


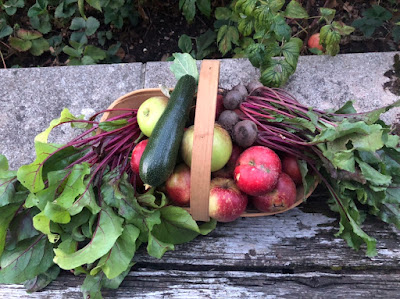
Back in my little veg patch, I’ve been harvesting tomatoes, beetroot, carrots, apples, rosehips and chard for weeks now and trying to ignore rising energy costs as I process it all into chutneys, soups, jams, butters and cordials. 


The endless stream of tomatoes has now, unsurprisingly, finished.  I grow mostly cherry types with Mr Fothergill's Cherry Falls doing well for me every year. Four plants provided at least half a kilo of fruit week after week - most were bottled or preserved; I can recommend the Tomato Kasundi recipe in The Modern Preserver book, a warm Indian spiced chutney.  Larger beefsteak tomatoes from a friend's allotment were deskinned and deseeded, combined with onion and peppers and made into an easy and delicious soup for the freezer. I must put seeds for big tomatoes on my list for next year. 

Beetroot have been roasted, eaten, made into chutney or delicious muffins (my thanks to Karen for the recipe; my waistline applauds you!)  or frozen. Yes, frozen - who knew that was even possible! Well, I do now.  (Cooked, peeled, sliced for ease of defrosting, and laid out on a tray to flash freeze before being bagged up, labelled and frozen for up to 6 months.)  

Carrots.  I was gifted seeds from Premier Seeds in Poland to try. By summer's end, the roots were still frustratingly small but tasty so I left them to grow on a bit. By the end of October, after a warm and wet month, the roots were fat, large, and delicious.  Those seeds will definitely go on my list for late autumn veg next year!

My apples have mostly been windfalls, but nothing has been wasted. The bruises and wildlife munchings have been chopped out and the good bits made into utterly delicious Spiced Apple Butter or stewed for the freezer. Fruit butters are a thickened spiced purée -  a spread I hadn't come across before which has now introduced me to a whole new world of toasty deliciousness!

November in the garden. I will ...

  • Cut autumn fruiting raspberry canes down to a few inches above the soil once the leaves have all dropped.  Mulch the soil to feed the canes once done. The fruit was not good this year; hoping for better next.
  • Stake and mulch around broccoli plants - they get big and hungry!
  • Gather leaves for leaf mulch. A large black bag with air holes punched in will do but any large container that lets water and air in and out will do; leave for a year or two. 
  • Plant garlic cloves
  • Divide rhubarb and replant divisions. Mulch around the crowns. 
  • Sow Aquadulce or Sutton broad beans (these are winter hardy types), sweet peas
  • Plant spring bulbs! 
  • Start to prune apple, pear and quince trees for shape and to cut away dead, diseased or crossing branches
  • Empty the compost bin (My least favourite job!)
  • Put out bird feeders or check food levels in existing feeders.

Next in my client gardens I'll be pruning back untidy shrubs (but not those that flower in spring!), relocating a rose bush that's outgrown its space, planting bare root roses (perfect time for this!) and reducing other roses by up to a third to avoid wind rock to the roots. There's also still time to plant up some large pots for a bit of winter colour.

If you've enjoyed reading this, come back for more inspiration for edible and colourful winter pots!

The preserving books I refer to:

  • National Trust Complete Jams, Preserves and Chutneys - for apple butter. Windfall Chutney and the best blackberry and apple jam.
  • The Modern Preserver, Kylee Newton - for Tomato Kasundi and Beetroot & Orange Chutney
  • Gardener Cook, Christopher Lloyd - for Old Fashioned Quince Pudding and other quince recipes.


26 Apr 2022

Progress at last!

The seed sowing begins ...

This month I've been pondering on why some seeds fail and the relativity of time ... days pass quickly when enjoying yourself but waiting for seeds to germinate? Not so much. Having sowed trays of peas and broad beans late in March (and loads more seeds throughout this past month), I check daily for signs of life and get excited when tiny green shoots poke up above the soil. (Hello cape gooseberries and ahoy Pak Choi!) This month has been more of a waiting game though and I’m feeling the pressure to get plants growing and planted out in a timely fashion.

The weather hasn't helped ... after a blast of sunshine early in the month, the skies then became grumpy and rather chilly.  This was not ideal for the bean and pea seeds growing outside in the shelter of my tiny balcony. I start hardier seeds off outside as I like to keep windowsills indoors clear for the deluge of more tender seeds to come. Sometimes my optimism is misplaced.

Earlier in the month, having monitored daily for the appearance of broad/fava bean and sweet pea seeds, I began to wonder if they were all duds - and then it dawned on me to check the label I’d put with the plants. Even though it seemed like ages since I'd sown the seeds, it had only been a week and temperatures were chilly. Doh! 

However, sigh of relief, after a respite indoors on the kitchen windowsill, shoots appeared within a few days; at 2 inches tall, the plants went back onto the balcony. And now I have ten sturdy little plants planted out and growing well.  (There were supposed to be fourteen but four seeds did fail to germinate, such is life.)


Why so few plants? Well, the broad beans were destined for two 12 inch wide rows in the Abundance Bed which is my project this year. I decided to dedicate an area of the veg patch for an Abundance Bed after reading Huw Richard's book 'Veg in One Bed' (reviewed in December); I love being told what to do and when. Sticking to the book's plan of action, my broad beans were planted out mid-April when the plants were about 4" high.  Whew ... just in time! 

But why do seeds sometimes fail?

Sometimes the seeds are just too old if kept from year to year. Once packets are opened, seeds start to deteriorate and the energy stored up for germination is lost - basically, they run out of puff. I’ve started marking new seed packets with the date that I opened the foils and pay attention to the year packed as well as the ‘sow by’ date.

Some seeds will last longer; I’m sprouting a few old orca and Borlotti beans in cotton wool to test their viability rather than wasting seed compost. I first saw this done with slow germinating seeds like parsnips, tried it for myself and it worked. I’ll plant the seeds when (if!) signs of life are seen. 

It's guesswork knowing the best time to sow seeds; the sowing timelines on the packet caters for gardens at all extremes of the country but it is only guidance. Too cold and they’ll struggle to germinate. Too early and they struggle for light. Too late and annual plants don't have enough time to fully develop.  That's particularly true for chillies (always hit and miss for me) but I've finally got my tomatoes, cucumbers, chillies, leeks and peas sown.  All in modules, destined for the windowsills - the first lot for the warmth needed to germinate the seeds and the peas to (hopefully!) keep the mice from eating them. 

I've sown runner beans, sweet corn and french beans into root trainers this morning; squash and courgettes are next - maybe a teeny bit later than usual but with slightly warmer weather now, they should quickly grow into strong plants. Fingers crossed, eh?

And the sweet peas? Well, after three weeks of daily checking, a few tiny shoots popped their heads above the soil, just fifteen out of the 30 tubes sown. That'll do.  But lesson learned: noticeably it's the freshest seeds that have germinated (plus a few from last year) so some ruthless seed culling is needed! 

So, as ever at this time of year ... onwards!


17 Apr 2022

Gardening by the Easter moon


Last night's skies were lit by April's Full Moon - also sometimes known as the Paschal Moon as Easter falls on the first Sunday after its appearance which, in this case, is today. But that’s not its only folklore name … Native Americans know this moon as The Moon of the Red Grass Appearing - which is rather poetic, and beautiful in my opinion. 

All this moon's names relate to spring getting underway. Anglo-saxons called it Egg Moon; extraordinary how there's a link back to all these names in today's culture ... spring chicks, Easter eggs ... not too sure about Easter bonnets though! The Celts on the other hand were possibly more in tune with nature? They called this Full Moon the Budding Moon, New Shoots Moon and Seed Moon. Yep, it's the month to get sowing.  

The general idea seems to be that while the moon is going from new (no moon) towards full, it exerts a growing (waxing) influence over water and therefore plant life. That period is allegedly good for sowing or planting out crops that develop above ground - beans, chard, brassicas, leafy veg.

The reverse is true after the full moon starts to wane. The next seven days is a good time to sow seeds and tubers for plants developing below the soil ... beetroot, radish, carrots, leeks, parsnips, spring onions, potatoes (2nd early and maincrop), Jerusalem artichokes, dahlias, lilies, gladioli - you get the idea.  

I've planted up all my dahlia tubers in pots on my balcony so the next week should get them off to a good start. And I'll head out to the veg patch today to sow carrots, beetroot, another row of radish and plant more Jerusalem artichokes. 


The 'drawing down' energy is strongest straight after the full moon but fades as it wanes towards the new moon on the 30th. My almanac advises that the last week of the month is a dormant period with poor growth. Obviously my energies will be best directed towards garden maintenance - a good time to prune, weed, mulch and build supports for peas and beans.  

And with the weather here in the south of England forecast to be warm and dry, I think I should add watering to that list. 


14 Apr 2022

Ginger Nuts! How to grow fresh ginger (part 1)


I've been trying not to get too experimental with what I'm growing this year but ginger is a staple in my kitchen (so useful for warding off winter colds).  So, for the past few weeks, I've been nurturing a root into life in the dark warmth of my kitchen cupboards.

I last tried growing ginger seven years ago, and failed. But, inspired while watching Marcus Wareing's Tales from a Kitchen Garden on the BBC, my thoughts turned to the summer warmth in my sun trap of a salad garden and I decided to try again. And on my next shopping expedition, I came home with a sturdy chunk of promising looking ginger in my basket.

I've followed the method shown in episode 8 of the show where Marcus chats to a grower about spices. And that included ginger.  Compulsive viewing for a food grower - I now know where I went wrong before! 

As the saying goes ... if at first you don't succeed, try and try again. Especially as I've now seen a tried and tested method that practically guarantees success. (I'm nothing if not optimistic.)

So this is what I've done (so far) ...

  • First, sprout the ginger.  Soak the ginger chunks in water for a couple of days; that helps to revitalise it.
  • Next, seal the chunks in a clear plastic tub and store it somewhere warm.  I found the gentle warmth of the cupboard near to my oven perfect.
  • Finally, try not to forget about it! In a couple of weeks, buds on the ginger had started to form a tuber with visible roots (see main pic).  The whole chunk of ginger was then potted up into good peat free compost, leaving the growing shoot above the soil level and the new roots just buried. Keep the plant warm and the soil moist (never wet) and in six months or so, I should be harvesting my own fresh ginger. 
  • I used a 3 litre/7.5" pot because it's what I had to hand but a 10 litre/11" pot would be even better. I'll pot mine on once it's established. 
  • Ginger (Zingiber officinale) is a subtropical plant, thriving in humid conditions and nutrient rich soil. It spreads along the ground as it grows (hence the need for a big pot or greenhouse bed) and will need feeding weekly. 

Sprouted ginger root planted into pot.
Snuggled into it's new home ... 

Part Two of this post will be if/when this experiment progresses ... and my next experiment will be the lemon grass stalk previously destined for a pot of Thai breakfast soup but now sitting in a jar of water on my windowsill.

14 Mar 2022

Goodbye Storm Moon, Hello Worm Moon

Or to put it another way, goodbye February, hello March. And hello rhubarb, wild garlic, spring flowers and first tiny blossom on the fruit trees!

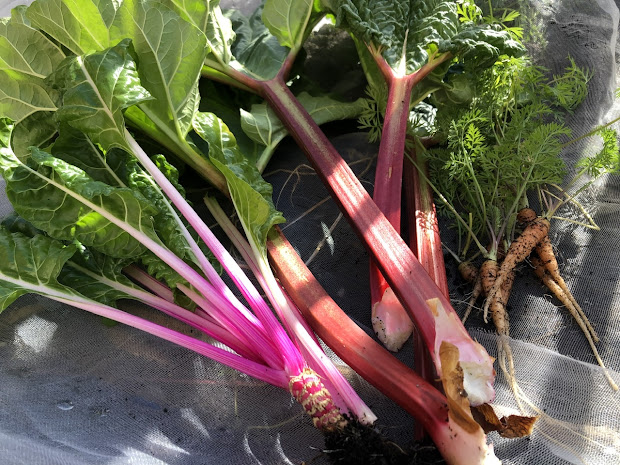
Fresh picked rhubarb, chard, carrots
Harvested this morning - love that Peppermint Chard!


Related Posts Plugin for WordPress, Blogger...