21 Jun 2016

Ch-ch-ch-chive talking

chive flower

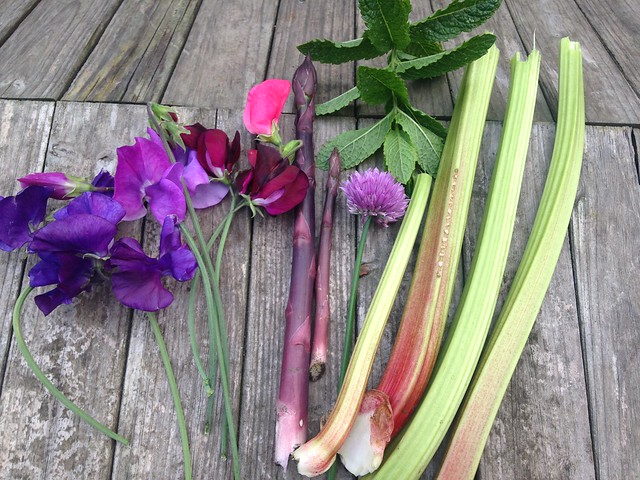
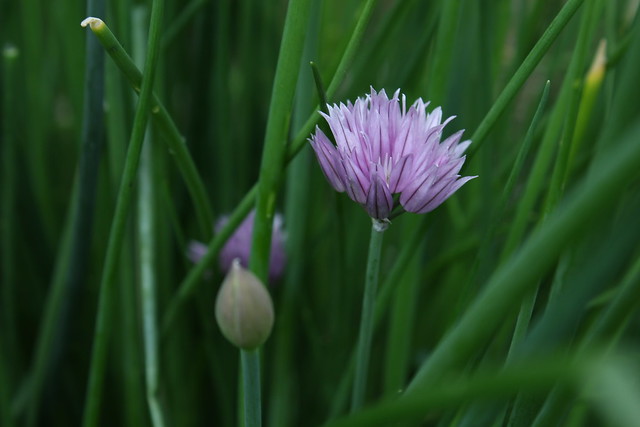
I love that the rain has made all the flowers bloom spectacularly, especially the purple pompom flowers of chives - they look so good against the green leaves and the bees adore them.  Such is my admiration for this noble herb that I planted a clump in my 'drought' border (the hose doesn't reach there) among perennials, grasses and alpines - to be looked at, not eaten.

The other clump sits, appropriately, in my herb bed where it's currently flowering prolifically.  Every plant (not just chives) is genetically predisposed to perpetuate itself which is why it wants to flower and thus set seed. To thwart my chive into flowering for longer, I deadhead as soon as the flowers start to fade so that new flowers are coming up all through the summer to delight my bee visitors.

The petals of the flowers can be eaten and taste, rather obviously, like sweet onions.  Just pick the individual bulbils off the head and scatter over a salad - with other edible petals, if that's your thing.  For a simple lunch, I like to chop the leaves into an omelette (add cheese as well if you like) and scatter the petals over the top as a garnish - delicious, quick and more sustaining than a packet of cheese and onion crisps!

Of course, all this ch-ch-ch-chive talking is so I can introduce an intriguing dressing that I came across recently - chive flowers with honey and cider vinegar. (Thank you omnipresent Swedish furniture company, recipe below.)  It allegedly pairs well with rocket and mustardy oriental leaves like mizuna and tat soi. Alternatively, it can be used to dress a warm potato salad or pan-fried bok choy, spinach or cabbage.  Mmm, I like the sound of that! (I'm a big fan of eating my greens.)

I haven't tried it yet as I've been on a juice diet to boost my energy levels for the last eight days but am excitedly anticipating making this dressing tomorrow evening for my first salad in a week!


Honey + Chive Flower Dressing:
(Makes 75ml)
10 fresh chive flowers
1 Tbsp honey (a light honey is best, eg blossom or acacia)
2 Tbsp apple cider vinegar
2 Tbsp olive oil or cold pressed rapeseed oil
Sea salt + freshly ground black pepper

Put all ingredients in a blender and whizz to an even texture. Season with salt and pepper. Pop into a nice jug and use. Simples.


Why grow chives?  Apart from being a very useful kitchen herb, chives stimulate the appetite and, by extension, digestive juices. Useful for anyone feeling under the weather and less like eating.  Also, chives have antioxidant properties (great for zapping those free radicals) and the leaves are mildly antiseptic.

On a final note, because chives are hardy perennials they die down in winter so here's a couple of ways to have some for the colder months.

Herb butter - mix 4 tbsp of snipped chives into 100g unsalted butter.  Beat well to mix, add 1 tsp lemon juice. Freeze and use within 3 months.  Delicious on a jacket potato.

Ice cubes - but not with water! This is something I would never have thought of but read about in 'Jekka's Herb Cookbook'.  Cut chives late morning, nice green leaves only, wash and dry on kitchen paper. Snip the leaves into individual sections of the ice-cube tray; once full, put the tray into the freezer - do not add water! Freeze for 48 hours.  When that time's up, transfer to freezer bags. Get the bags ready as the cubes will defrost rapidly, take the tray from the freezer and immediately pop the chive cubes into the freezer bag and return to the freezer straight away. These portion sizes are ideal for a winter omelette.

Personally, I'm loving the idea of chive ice-cubes - hope this post has been useful to a few folk!


5 Jun 2016

Bumble and Pod

Garden gathered
Not much, but at least there were flowers!
Supper of mint tabbouleh, steamed asparagus, salad + chive flowers, yoghurt and rhubarb compote. 


I've been struck by the 'hungry gap'.  I had this covered last year with plenty of kale, broccoli and chard to pick but this year I have failed abysmally. Blame has to lie somewhere so, yes, I am going to point my finger at the weather.  The mild winter encouraged my broccoli and kale to bolt in January, leaving me with nothing. Still, the bees enjoyed the early nectar-fest from the yellow flowers. The plants have now all been ripped out and composted leaving beds ready for the next crop.

But that same mild winter meant that broad beans sown in early February grew well in modules on my balcony. Although they were slightly sheltered from the cold wind, it was a chancy experiment as Karmazyn beans are not as winter hardy as, say, 'The Sutton' or 'Aquadulce', beans that are bred to be sown in November.  My beans were planted out in mid-April and have been flowering for the past few weeks - some of them already have small two inch pods among the flowers and the bumbles are all over them.  (This is unusual for me but perhaps less so for other gardeners; I've checked my notebooks and see that I usually sow later in mid-April.)


I've been checking on them regularly, not for pods but for the dreaded black aphids.  And this is where (finally) it gets interesting. I have squished a tiny amount of aphids on a couple of the plants but (dare I put this in writing?) they're otherwise aphid free. (For now.) This is excellent news as I haven't yet pinched off the top leaves of my plants which are insanely delicious steamed and served with a knob of melting butter and a grind of pepper.  The meal appeal dwindles if you have to wash a large colony of black insects off first.

Bizarrely, just across the path in my herb bed, less than a metre distant, the angelica is clogged with black aphids as is a nearby feverfew plant. Has anyone else experienced this selective colonisation or are your beans under attack?  Or is this one of the benefits of planting earlier?  If that's true, then early sowing is an experiment worth repeating.

Disgusting, right?  I'll spare you the extra large view of these photos. 

One difference that I've noticed is that my beans are radically shorter than in previous years when I've sown direct into the ground in mid-to-late April.  Karmazyn bean plants last year were a good metre plus tall by the time they podded, even after having their top growth removed.  This year, the plants are about 60cm (24 inches).  I've sown another few rows of beans as I was sent some Red Epicure beans by Marshalls to trial plus I had some crimson flowered beans leftover in my seed box. Let's see what will happen with those ... I'm guessing I won't be so lucky next time.

Oh, hey - the sun has come out since I've been typing!  Looks like it's going to be a fine day (at last!) so I'm nipping off to the garden to make the most of it.  Happy gardening Sunday!


26 May 2016

Torn between two gardens

Lonicera

pear blossom

Ant + blueberries
Photos from late April: Honeyberry blossom, pear blossom, blueberry buds. 


I make no apologies for my absence here on the written page because, yet again, the gardening year has pounced before I'm completely ready.  One blog post a month? Shame on me! Still, all in a good cause - both the veg patch and the new 'middle garden' (so-called as it's bang-slap in the middle of the flats where I live) have both been dominating my time out of work hours, right up until the sun sets in the evening - but only on the evenings when I have the energy to garden after working a 10 hour day.

I thought the hard work in the veg patch was over and done last year when I fenced around it to keep cats and foxes out.  But, with me, there's always another good idea lurking - which is not to say that good ideas and the time available are necessarily compatible. That said, this spring I've reworked the veg patch: a perennial flower border has been created plus a new run of Polka raspberries; old rotten raised beds have been chucked out and replaced (with some neighbourly help) with scaffold board edging. The herbs have been dug up and replanted together into one area and a dozen or so Rosemary Beetles have met a terrifying early death under my boot. I'll spare you the view of the carnage. (By the way, keep an eye out for these pests because they'll swiftly decimate not only rosemary but also lavender and sage. I've previously written about them here.)

The above mentioned fencing project of last year is, by necessity, back on the agenda as the idea was sound but some of the bamboo canes weren't up to the task and have bent.  I blame small children leaning in to reach for the raspberries. Anyway, a nice chap up the road donated four tall tree stakes when he heard about the garden and these will be used as replacement corner posts.  One is in already as I had a chance to dig deep into a corner when I put up the trellis for my sweet peas a couple of weeks ago. The others will have to wait as excavating London clay is no laughing matter for my back.

Despite all this (and more), there have been many evenings and weekends when my first love has had to give way to the usurper - the middle garden. The vision for this garden is to bring it back to life as a welcoming space to relax in, preferably with dozens of flowers-for-cutting among nectar rich shrubs and perennials.  I know what I want but it will take a long time to get there -  no quick three week Chelsea build for me!

After lots of staring at the garden from my second floor window, I realised that until I cleared the extensive ivy and hugely overgrown hedges, it would be impossible to realise the garden's potential.  17 large bags of garden waste, a pile of brick rubble and 7 huge mounds of hedge prunings later, I feel we're getting somewhere. (As luck would have it, a neighbour is also enthused about the idea and her gardening talents have been well deployed.) There will be more details in my next post but at last I can now measure the garden so I can start planning! It's taken quite a few long days over many weekends during which time the veg patch has had to make do with just an evening or two of weeding.

There's two lessons that have come out of this - one, never ever plant ivy in a small garden unless you have time to maintain it and, two, weeding is probably the most important task to keep on top of in the garden. A bit like painting the Forth Bridge but, nevertheless, essential.

Back soon ... hope you're all enjoying the Chelsea Flower Show, in person or on tv.  You'll notice that I didn't go this year as I stupidly missed the deadline for both tickets and a press pass.  Duh.

Geum unfurling

27 Apr 2016

How to successfully grow huge chilli plants

first chilli flower


I don't want to jinx myself by putting this in writing but ...  I'm now quietly hopeful of growing some chillies this year since this flower appeared on my kitchen windowsill plant yesterday.

I'm being tentative in this claim as it's well documented that I'm rubbish at growing plants indoors. Outside, no problem, but inside? Bleh. I wonder why that is? There are many more buds waiting to open and I'm certain that this vigorous little plant has a lot more growing to do.

I bought the sturdy but tiny plant in mid-February from Joy Michaud of Sea Spring Seeds. She is an amazing and passionate chilli grower and it's a testament to her skill in giving plants a good start in life that this chilli has continued to thrive in my dubious care.

I didn't do at all well with my chilli growing from seed last year so this year decided to treat myself to head start in the chilli department - and it looks as though it's paying off.  I've potted the plant on twice since purchase and it needs to go into its final pot this week as I can just see a few roots at the base of the current pot.  This is possibly where I'm getting it right this year; I watched a couple of excellent videos from the Sea Spring Seeds youtube channel with some top tips. (Link below.)

Sea Spring harvested 2,407 chillies from one enormous Dorset Naga plant two years ago!  Joy is generous with her advice on how it's done - here are a few of her tips:

  • Seedlings should be pricked out into a one litre pot and, when the roots are showing at the base, potted on into a 7.5 litre pot; they'll grow rapidly and can then be repotted into successively larger containers, as needed.  A plant will grow to the size of it's pot (depending on the variety of chilli you're growing) but a small pot will restrict its growth.  (Video explaining this here.) The giant champion Dorset Naga was in a 160 litre container! Possibly too big for my space - and for my cooking needs - but you take my point. 
  • Mix dried chicken manure pellets into the potting compost when transplanting into each successive pot from 7.5 litres upwards; these are slow release and will provide your plant with essential nutrients all season.
  • Water well and fertilise regularly throughout the season (in addition to the chicken manure pellets).
  • When the plants get large, support the branches. Push a couple of canes into the side of the pot and circle the plant with string, securing it to the canes. Add more layers of string as the plant grows.

So there we have it.  If I follow all this good advice, I might just have to book my slot at the local horticultural show this year!

For fellow chilli growing novices like myself, oceans of good advice can be found on the Sea Spring channel here: https://www.youtube.com/channel/UCfZtoYQwmLpJ3k6BYVH4aFw

Update.
By August, I had lovely large plants and chillies ready for harvest - all grown on my balcony.  Read that post here: A chilli update

21 Apr 2016

Pickings and Pie


This year I have three rhubarb plants.  I don't need three, I needed one (all that my space would allow) and grew Glaskins' Perpetual from a seed several years ago.  It's huge and not very pink but I feel very proprietorial as I nurtured it into life all by myself.  Even so, when I saw Red Champagne crowns for sale a couple of years ago, of course I thought they sounded better.  Red. Champagne. Mm mmm, what's not to love?

I bought two crowns, planted them under the fruit trees as I'd read that rhubarb could tolerate a bit of shade and where (at the time) there was plenty of bare earth that needed covering and left them to it.  I thought I'd lost one plant last year as, without a hose, things get pretty dry under the trees.  The other decided to flower you may remember.  I wondered whether I'd ever get to taste any red champagne sticks but the crowns were inexpensive so it wouldn't be a huge loss. But reports of the death of my champagne rhubarb crowns were premature.


This spring, with the winter being relatively short lived and the rain lasting rather longer, I've watched rhubarb sticks from all three crowns gradually appearing over the past few weeks.  At one point I was tempted to plonk a black plastic bucket over one of them to try my hand at forcing but, as tends to happen, I didn't get round to it.  (Anyone had any success doing this? And is it worth it?)

Serendipitously, I opened an email from Simple Things mag last week to find a recipe for Rhubarb and Rosewater Tart. The timing was immaculate as I had the rhubarb in the garden and was in the mood for baking - and had some shop bought cheat's sweet shortcrust pastry in the fridge that needed using. (I'd like to say that I whipped up a batch of home-made pastry but I didn't. There.) It was delicious, whether eaten with cardamon flavoured cream or with friends and family. I made the pie in a smaller tin than suggested to share with family and used the extra filling with a dollop of jam in a small batch of Maids of Honour tarts for my goodie tin at home.

I've lost track of where we are in the gardener's calendar - I assume everyone's rhubarb is up and growing vigorously?  If you like the sound of the pie, the recipe is here and, with ready made pastry, is a doddle to make.   (The addition of rosewater is delicious but could be omitted if you have none, leaving a rhubarb and frangipane pie.)
Related Posts Plugin for WordPress, Blogger...